This guide describes the procedure to follow to check Genious emails on the Gmail console,
1-> Add an account:
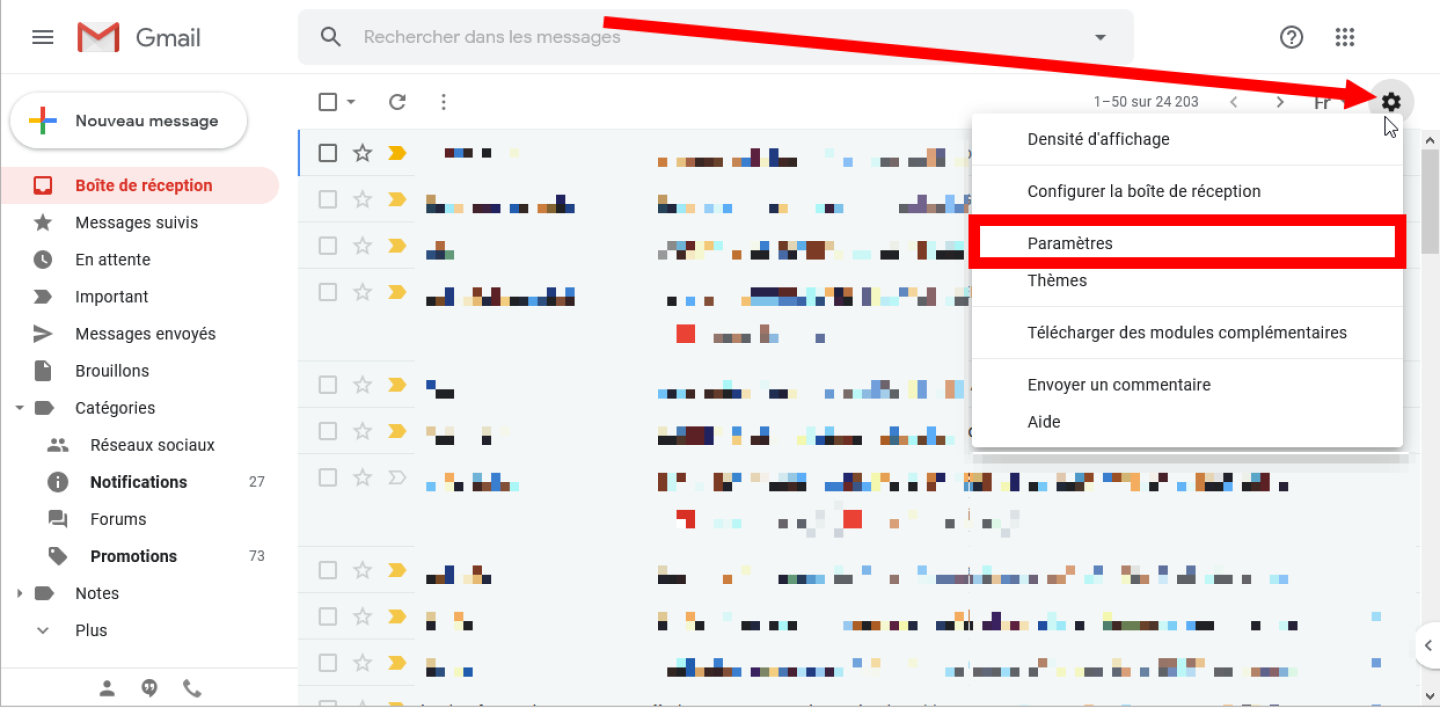
From the main page of your Gmail account, click on the cogwheel icon at the top right to access the Settings (Paramètres) for your mailbox.
Then go to the Accounts and import section ou Comptes et importation. In the Send emails as section or Envoyer des e-mails en tant que, click Add another email address or Ajouter une autre adresse e-mail

In the pop-up window, enter your name and address which will appear on the email you send, keep the process checkbox or Traiter comme un alias checked, and click Next step Etape suivante.

2-> Configure the SMTP server:
Enter the address of the SMTP Server as well as the Port used:
SMTP server: the name of the Genious server, appearing on the ACCOUNT INFORMATION email, received when registering the hosting package, (in the form of XYZ.genious.net)
Username: your email account
Password: Password of your email account
Port: 465
Confirm your account configuration by clicking on the Add an account button or Ajouter un compte.

3-> Confirm your email address:
In principle, Google should send a confirmation code to your business address.
Connect to the webmail of your domain name and click on the validation link or copy the code indicated to paste it in the Gmail validation window and press Validate or
Valider.

Now, in addition to receiving all your professional messages on Gmail, all new messages you write from your account can be sent using your professional email address.
